OK, so first of all, I LOVE old houses. I will write more on that later, but my husband and I bought an old fixer-upper 4 years ago. This has been my dream for some time. Not as much the hubs' dream as it was mine, but he's a giver. What can I say?
So, after lots of other fixing up of other parts of the house (again, I will post more on all that later), I got back around to my kitchen. When we moved in, I gave it a quick coat of paint, and called it a day. So now 4 years have come and gone. Many hours have been spent on Pinterest, with me salivating over light and airy kitchens. All leading me to the desire to lighten and brighten my own kitchen.
Our cabinets, while in great shape, were... well... dark and dated. My kitchen felt dark and dated. So after convincing the hubs that painting the cabinets would make our kitchen feel lighter and look bigger, he conceded. Like I said, he's a giver. So again, after a lot of hours on Pinterest, reading about the virtues of chalk paint, and after talking to a friend who painted some furniture using Annie Sloan chalk paint, I went to a local store that carried it, and immediately, I was hooked. I chose Annie Sloan Country Gray, and I opted to go with distressing it and just doing the clear wax finish.
I spent a total of 18 hours painting, waxing and buffing to complete my upper cabinets. Later I went back and spent around 12 hours painting and buffing the lower cabinets. All this with 2 quarts of paint!

This is the kitchen shortly after we moved into the house. Ugh! So dark!
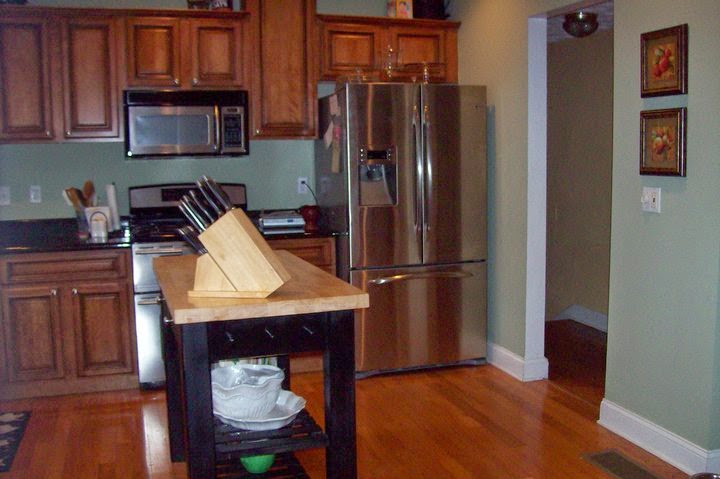
This is after painting only the uppers. I did live with the two tone for several months, then decided to bite the bullet and paint the lowers as well. I am so glad I did. BIG DIFFERENCE! I can't believe how much happier I am in this kitchen!

Here it is, after the uppers were painted with Annie Sloan Chalk Paint in Country Gray. I also painted my island in pure white.

The process is simple. No sanding or priming needed. I thought it was too good to be true, but it really takes NO PREP! I painted 2 coats of paint, allowing the paint to dry about an hour in between coats. After the second coat dried, I simply lightly sanded the doors until I achieved the distressing look I was after. Then, using the Annie Sloan wax brush, I applied the clear wax and buffed. I worked in small sections. You buff until the wax is no longer tacky to the touch. As soon as it feels dry, it is done!
I can honestly say, I don't think I will ever paint wood or furniture with anything else but chalk paint. I am hooked!!!
To further lighten the space, I decided to do a simple burlap roll shade on my windows. Simple treatment. I just cut a board the size of the width of my window. I cut my burlap 3 inches wider then the window, allowing 1 1/2 inches hem on either side. I cut the burlap the length of my windows, hemmed the sides with a simple straight stitch, stapled it to board. Then I made straps out of contrasting fabric. To make the straps, I cut 2 pieces of fabric 4 inches wide, to allow for a 1/2 inch seam allowance. Turned the fabric right sides together and sewed along the long edge. Turned it, pressed it and stapled each strap 7 inches from the outside of either edge of the board. It made 2 loops. I rolled the shade up and they rested in the loops that the straps had created. Trust me, it sounds more complicated then it really was.


My little seating area. I got the bench and chairs and table from a little antique market I love. I did paint the chairs, but the table and bench were left the way I found them.
As you can see, this picture was taken BEFORE I painted the uppers. :-)
The next phase will be the back splash. I will update when we get that finished! But for now, I am enjoying my lighter and brighter kitchen.

LOVE! LOVE! LOVE! Can't wait to see the backsplash. You're my favorite decorator in all the world!
ReplyDelete<3